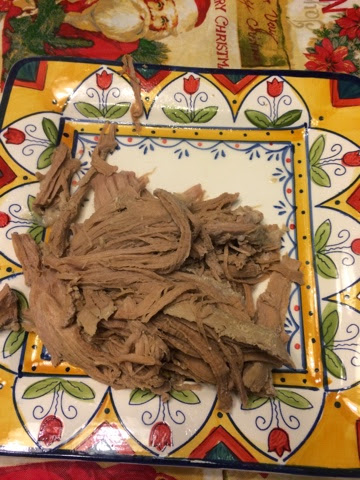
Friday, December 19, 2014

Recipe- Teriyaki Pulled Pork Rice Bowls


With me going back to work part time I have started to try and make more crock pot meals. This was one I kind of made up on the fly the other night, and my husband loved it. I opened my freezer to find a lovely  HORMEL ®   ALWAYS TENDER ® Teriyaki Pork Tenderloin. I threw it in the crockpot, covered it in water and let it sit on low for at least 8 hours. (You could do high for 4 hours as well.)  When I got home I cooked some rice and made some stir fry with what vegetables I had in my freezer. next time I will make sure to have better stir fry worth vegetables, but here is the basic recipe.


Hormel ®   always tender  t eriyaki pork tenderloin 
1 Cup rice
1/2 C  Teriyaki Sauce
1 TB Soy Sauce
1 tsp Garlic
1 tsp Ginger
dash Salt
1 tsp Brown Sugar
Bag frozen stiry fry vegetables

Slow cook the pork tenderloin till it easily shreds on its own.
Cook the rice
Mix the teriyaki sauce, soy sauce garlic, ginger, salt and brown sugar in a bowl and set aside
Saute the vegetables in a little olive oil, when cooked then add the sauce and let them simmer om medium heat for a few minutes. Then you can build your own teriyaki bowl. Yumm!! Super easy and yummy!


In the spirit of full-disclosure, I’ve partnered with Hormel Foods as part of the Hormel Foods Extended Family Blogger Program. Throughout the year I’ll be receiving product, coupons, giveaways and promotions. However, no payment was given or expected for posting about the program, and as always, all opinions given here are fully my own.

Sunday, December 7, 2014

DIY Christmas Picture Ornaments

Every year we give our kids a new ornament to represent a memory form the year. Sometimes its from a place we visited or can be from a fad they are into. For example this year my girls love Frozen. The problem is the demand and cost of frozen ornaments is ridiculous. I decided to make my own.
I started with buying this little wood rectangles from my local hobby store. They came with 4 to a pack. You can paint this if you want just make sure they dry all the way before moving on to the modge podge part of it.

Then I printed out the pictures  I waned on picture paper from my printer. Then I modge podged them on.


The wood  was so soft I just used a screw driver to punch a whole in them and string them. My girls loved them! They were so excited to hand them on the tree. The other nice thing is that there was plenty of room to put their names, the date and a little story on the back.