Friday, December 19, 2014

Recipe- Teriyaki Pulled Pork Rice Bowls


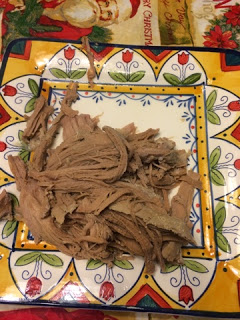
With me going back to work part time I have started to try and make more crock pot meals. This was one I kind of made up on the fly the other night, and my husband loved it. I opened my freezer to find a lovely  HORMEL ®   ALWAYS TENDER ® Teriyaki Pork Tenderloin. I threw it in the crockpot, covered it in water and let it sit on low for at least 8 hours. (You could do high for 4 hours as well.)  When I got home I cooked some rice and made some stir fry with what vegetables I had in my freezer. next time I will make sure to have better stir fry worth vegetables, but here is the basic recipe.


Hormel ®   always tender  t eriyaki pork tenderloin 
1 Cup rice
1/2 C  Teriyaki Sauce
1 TB Soy Sauce
1 tsp Garlic
1 tsp Ginger
dash Salt
1 tsp Brown Sugar
Bag frozen stiry fry vegetables

Slow cook the pork tenderloin till it easily shreds on its own.
Cook the rice
Mix the teriyaki sauce, soy sauce garlic, ginger, salt and brown sugar in a bowl and set aside
Saute the vegetables in a little olive oil, when cooked then add the sauce and let them simmer om medium heat for a few minutes. Then you can build your own teriyaki bowl. Yumm!! Super easy and yummy!


In the spirit of full-disclosure, I’ve partnered with Hormel Foods as part of the Hormel Foods Extended Family Blogger Program. Throughout the year I’ll be receiving product, coupons, giveaways and promotions. However, no payment was given or expected for posting about the program, and as always, all opinions given here are fully my own.

Sunday, December 7, 2014

DIY Christmas Picture Ornaments

Every year we give our kids a new ornament to represent a memory form the year. Sometimes its from a place we visited or can be from a fad they are into. For example this year my girls love Frozen. The problem is the demand and cost of frozen ornaments is ridiculous. I decided to make my own.
I started with buying this little wood rectangles from my local hobby store. They came with 4 to a pack. You can paint this if you want just make sure they dry all the way before moving on to the modge podge part of it.

Then I printed out the pictures  I waned on picture paper from my printer. Then I modge podged them on.


The wood  was so soft I just used a screw driver to punch a whole in them and string them. My girls loved them! They were so excited to hand them on the tree. The other nice thing is that there was plenty of room to put their names, the date and a little story on the back.

Sunday, November 30, 2014

Perfect Appetizer in a Pinch


If you're having some games with some friends or need to bring an appetizer to someone house I perfect dish to share. This time of year I feel like there is lots of sweets going around and I like something a little different. I love me some homemade jalapeno jelly. Ever since Utah Mom's Life showed me how to make some its my new favorite thing to can in the fall. Recently I added a slight twist to my usual sack and it has made all the different. Its salami. I took Hormel's Gatherings with cheese, crackers, pepperoni and salami tray and added cream cheese and  jalapeno jelly. Layer a cracker, cream cheese, meat and some jalapeno jelly and enjoy. Now you can add a little kick to the usual meat, cheese and cracker tray.
In  the spirit of full-disclosure, I’ve partnered with Hormel Foods as part of the Hormel Foods Extended Family Blogger Program. Throughout the year I’ll be receiving product, coupons, giveaways and promotions. However, no payment was given or expected for posting about the program, and as always, all opinions given here are fully my own.

Wednesday, November 26, 2014

Leftover Thanksgiving Turkey Pot Pie

I came across this recipe on Kraft's website or magazine a few years ago and it is my favorite. I use this with leftover turkey, corn and green beans. It's super fast and easy to make as well!
Zippy Turkey Pot Pie

3/4
cup  milk

1/4
cup  MIRACLE WHIP Dressing

1
Tbsp.  flour

1-1/2
cups  KRAFT Shredded Sharp Cheddar Cheese

3
cups  chopped cooked turkey (about 1 lb.)

1
pkg.  (10 oz.) frozen mixed vegetables(peas, carrots, green beans, corn), thawed - This is were I add any leftover veggies I have. 

1/4
cup  chopped onions

1
 ready-to-use refrigerated pie crust 

HEAT oven to 400°F.
MIX milk, dressing and flour in large microwaveable bowl. Microwave on HIGH 2 to 3 min. or until sauce is thickened, stirring after each min. Stir in cheese; microwave 1 min. Mix until well blended. Add turkey, mixed vegetables and onions; toss to coat. Spoon into 9-inch pie plate; smooth surface. -Note this recipe only calls for the top part of the pie, which I actually like it that way.
PLACE crust over filling; flute edge and seal to rim of pie plate. Cut several slits in crust to permit steam to escape. Place on baking sheet.
BAKE 30 to 35 min. or until crust is golden brown. Let stand 10 min. before serving.


What do you like to turn your Thanksgiving leftovers into? 

Tuesday, November 25, 2014

Black Bean and Ham Soup

HORMEL<sup>®</sup> CURE 81<sup>®</sup> Classic Boneless Ham

Are you one of those families that do ham for Thanksgiving? One year we had dinner with a family that smoked their ham, it was the best ham I have ever had! I thought today and tomorrow I would share my favorite left over recipes. Today I will post black bean and ham soup. I love black beans. I love black bean soup even more, and to add Hormel's yummy Cure 81 ham makes it that much better. I use Hormel's Cure 81 Ham because I know I don't have to do much to have it come out tasting good. It has great texture and flavor.  


 This time I also turned my recipe into a crockpot meal this time, to make my day a little easier. I bet it would freeze just fine too. So my amounts are a little general depending on how much ham you decide to add or how much you want to make. 

Black Bean and Ham Soup
3 Cups Chicken broth
1-2 Cups Diced Hormel Cure 81 Ham
1 Medium Onion Diced
1 Bell Pepper Chopped (I did red this time, but green is good too)
2-3 Garlic Cloves
2 Cans Black Beans
1 Can Petite Diced Tomatoes
1/2 teaspoon Cumin
1/2 teaspoon Chili Powder
Salt and Pepper

Add all the ingredients to the crockpot and cook on low for 8 hrs or on high for 4 hrs. You can then top it off with sour cream, or green onions or shredded cheese. 


This time I bought soup bowls. The kids thought that was the coolest thing ever. Even my pickiest eater was willing to eat the soup because it was in a cool bowl.


Tomorrow I will post my favorite turkey leftover recipe. Maybe I'll even link up for people to add their favorite leftover turkey recipes. 


In the spirit of full-disclosure, I’ve partnered with Hormel Foods as part of the Hormel Foods Extended Family Blogger Program. Throughout the year I’ll be receiving product, coupons, giveaways and promotions. However, no payment was given or expected for posting about the program, and as always, all opinions given here are fully my own.

Friday, November 14, 2014

School Days Nostalgia


Who remembers the cafeteria peanut butter bars? I do, and I didn't even have school lunch very often. When I did I picked either a day where they had pizza or peanut butter bars. Can you imagine had the school put those on the same day, it would have been genius. School lunch sales would have hit all time highs. I decided my kids needed to enjoy a little Delicious nostalgia from my youth. I looked all over for the right recipe, and I think I found it at www.triedandtriedagain.blogspot.com. Not too hard, but would be just as delicious as I remember them being. I think I found it. It actually was a pretty easy and quick recipe. My kids even had a blast helping make them.
Lunchroom Chocolate Peanut Butter Bars 
1 1/2 C Flour
1¼ tsp. Salt
½ tsp. Baking Soda
¾ C Butter -best if at room temp
¾ C Sugar
¾ C Brown Sugar
1 ½ tsp. Vanilla
1 1/2 C Creamy Reduced Fat Skippy Peanut Butter (split )
2 Eggs
1 ½ C Quick Oats

Preheat oven to 350 degrees. 
In a small mixing bowl, mix together flour, baking soda and salt. 
In a large mixing bowl, cream together butter, sugars, 3/4 C Skippy peanut butter, eggs and vanilla until light and fluffy.  
Gradually add dry ingredients, just until incorporated.   Then, s tir in the oats.   Spread onto a greased 11 x 15 Jelly Roll Pan (cookie sheet).   Bake for 12-15 minutes, or until golden brown.   Cool for 10 minutes.


Frosting:
½ C Butter (1 stick) 
3 ½ C Powdered Sugar
2 T Cocoa
¼ C Milk 
1 tsp. Vanilla

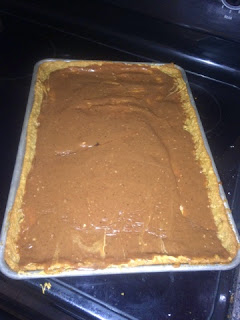
The frosting is a two step process. First, whip the remaining ¾ C Skippy Peanut Butter until it becomes lighter colored and fluffy. Carefully spread the whipped peanut butter over the pan cookie.


Then, add butter to a small sauce pan and melt the butter. Add the milk and cocoa. Cook over medium heat, stirring constantly. Heat just until boiling. Remove from heat and add vanilla. Then, gradually add the powdered sugar. Stir until thickened. Pour over the peanut butter and gently spread over the cookie. Cool completely, and slice into bar cookies.

Then pick you could pick out one of your favorite books from elementary school and have story time with delicious peanut butter bars.  Perfect blast from the past. 


In the spirit of full-disclosure, I’ve partnered with Hormel Foods as part of the Hormel Foods Extended Family Blogger Program. Throughout the year I’ll be receiving product, coupons, giveaways and promotions. However, no payment was given or expected for posting about the program, and as always, all opinions given here are fully my own 

Tuesday, November 11, 2014

Planning the Chaos


One major tip that helps me manage much of my chaos is a little old fashioned; it's a day planner. I use a day planner to help me stay semi sane, it helps me be where I need to be and helps me stay on task. I know I could use my phone but, its not the same. I can't easily write down, plan or look up stuff. Finding the right day planner can also be tricky. I don't like the little check book size ones because they are too small. I'm also too cheap to buy the big huge nice and fancy ones. The Homemaker's Day Planner is perfect for me and my needs.

First of all I love how the monthly tabs are separate from the week tab. Why? Simple, I like to use a butterfly clip or paperclip to help me keep my place for the current week.  Usually other planners have the month, then each week broken down. So when I open up to this week, but need to look at the month as a whole I have to un-clip and flip to find it. When its separate I can look at each month as a whole to help get quick ideas of what the month is like, or to count if it's the 3rd Wednesday of the month and so on. As a side note I know some people rip out pages when they have passed them, I don't for several reasons. One main reason is it helps me track at the end of year how many dr appointments I went on so I can track mileage and cost for my taxes. Quite often I have to look back to see when I last did something or if I missed something. Hence why I clip to easily get to my current week, but still need all my past pages for reference purposes.

The very front of the homemakers day planner has a year breakdown for this year and next year. I love this so when my kids came home in September with dates I needed to remember for next year but I don't have next years day planner yet I can jot it down. Then when I order my next years day planner I can transfer the dates. Plus I can highlight or mark plans for trips or things that I need to keep in the forefront of my mind.
Displaying FullSizeRender.jpg

I also love how each week has a place for tasks. Sometimes I need to make a list of things that need to happen in general during the week. Like call the dentist, buy a light bulb for the fridge, or take something back to the store. Sometimes I have things that don't need to be scheduled exactly on a certain day, but need to be done in general.

I love the menu part of each week too. I usually plan 5ish meals a week and will switch them around during the week, but overall I like to have the week planned for meals. This helps me make sure I have all the ingredients and helps things run more smoothly. Some days we have piano at 4:30, scouts at 6, I have church responsibilities at 7 and my husband is working late. Those days are great for one of my quick meals like grilled cheese and tomato soup. Other days I have nothing scheduled and I can plan a more elaborate time consuming meal.  Knowing what my schedule is like, while looking at my grocery store circulars for sale items then writing it down helps lesson the chaos at home. Not to mention this helps save money on groceries or gas money for too many grocery store trips. Less hungry whiny kids plus non-stressed mom plus saving money equals much happier family dinner memories.

The back of the day planner has tear out grocery lists. I love this! For instance when I realized I needed a new battery for my fit bit, I wrote it on my list. When my son realized he ran out of cream cheese for his bagels he can add it to the list. This way I don't go to the store 5 times before I remember to buy either items, It's right there for me to see.

Its that time of year where my January is already starting to fill up. Kids basketball, husbands work seminars, church functions, school activities are adding up and its time to write them down so I don't forget or over extend myself. I am using the homemakers daily planner and love it. It saves me so much time knowing what is going on when.  Click the picture above or go to http://www.homemakersfriend.com/index.html to purchase yours.  Now the next tip is to not loose your planner, because when that happens I feel like I lost my whole brain somewhere!

Thursday, October 30, 2014

Easy Dinner Idea- Pasta

This post is going to start different than planned. It was going to be about how angel hair pasta cooks fastest, and how to keep some spaghetti (or other pasta sauce) on hand can help make a fast dinner. In the end I think it's about how chaos can even sneak a few points in there too sometimes!
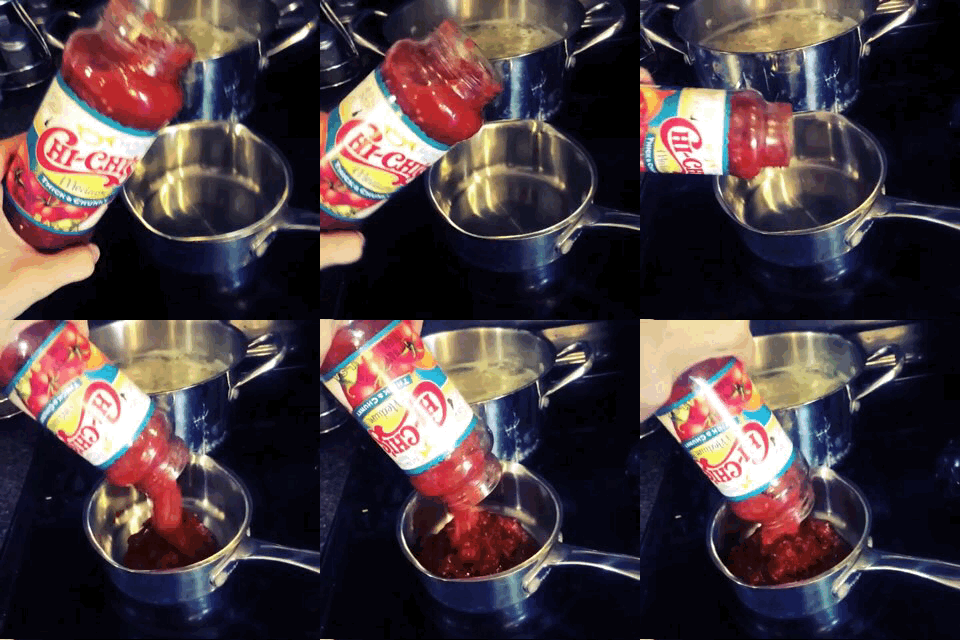
Yesterday was a long day. So when I was making my quick pasta dinner I grabbed a jar that Hormel sent me to review. I saw pictures of tomatoes and garlic with the words thick and chunky on it, and assumed pasta sauce. I even decided to try my new app and make my first gif to go along with this pasta dinner post. After I poured it in the pot I thought, something is off about this pasta sauce. Sure enough that's because it's not pasta sauce, It's salsa! Good thing I caught it, cause that would have been some weird pasta!

So as a side note I will review Chi Chi's salsa and let you know what I think. I might try it in a yummy recipe, let me know if you have a good one to try!

Wednesday, October 29, 2014

Easy Dinner Ideas- Anything Covered In Syrup

The title says it all. Usually when I need something fast that I know all my kids will like I go with Breakfast for dinner. Anything my kids can put syrup on is never a fail in my home. Pancakes, waffles, french toast or even scones. Yup I once told my kids scones were pancake balls so to this day they cover them in syrup.


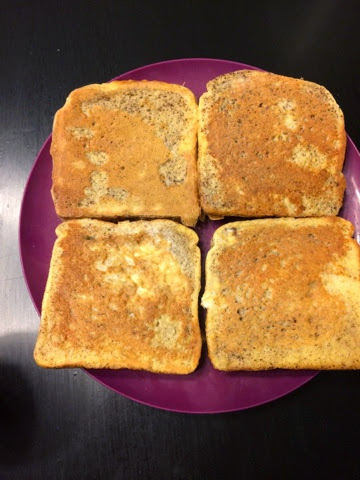
I think french toast is one of my favorites. Granted I like to make my french toast with texas toast. This is something I had to actually make a habit of keeping in my pantry just so I could make french toast in a pinch. My favorite thing to add to the toast is a syrup I got from a friend a few years ago that she called Magic Syrup. This is how you make magic syrup.
Magic Syrup:
In a saucepan melt 1 cube of butter; add 3/4 Cup of sugar and 1/2 cup of buttermilk. I don't usually have buttermilk on hand even though it is cheap and lasts a long time. It's OK if you don't just do milk and about a half a Tablespoon of white vinegar. Boil this then add 1 teaspoon of vanilla and 1 teaspoon of baking soda.
My kids love to scoop out the bubbles onto their toast. 

Tuesday, October 28, 2014

SkippyYipee

To add to my crazy week I thought I would add my favorite snack. It's Skippy peanut Butter. It goes with so much stuff! I like it plain, with celery, raisins, on crackers, on toast, or sometimes with chocolate. I tend to be an ornery mom when I'm hungry. So Skippy makes me more of a yippee  mom! When I fell full i can be more spontaneous and fun. Peanut butter has the protein I need to fill up and goof off.  Here's some of my Skippy Yippee's moments from last week of just goofing off and enjoying life as a craze (not ornery) mom!

Baby Cell Phone Selfies
Mario Kart Tournament
So click here to have some fun with the #SkippyYippee Fun Button. It may just help brighten up your day and help you get through one more crazy day.


Ithe spirit of full-disclosure, I’ve partnered with Hormel Foods as part of the Hormel Foods Extended Family Blogger Program. Throughout the year I’ll be receiving product, coupons, giveaways and promotions. However, no payment was given or expected for posting about the program, and as always, all opinions given here are fully my own 

Easy Dinner Ideas- Hot Dogs or Chili Dogs

Let me start out by saying I am not a huge hot dog fan. I don't eat them very often, but if I do I like them 3 different ways. Grilled, in central park with mustard or with Hormel Chili. Since I don't have time to bust out the grill, and I'm not in New York, then that means its time to bust out the chili dog.
Displaying IMG_8179.JPG

Hot dogs are one of my kids favorite things to eat. They are super easy to cook as well, whether you boil them or use the microwave they don't take very long at all. Although my kids just like to dip theirs in ketchup Dad and I like ours with Hormel chili. Dad likes his hot dog  in a bun with cheese and jalapenos, I sometimes like mine just like my kids- plain on a plate, no bun. Either way adding the chili elevates the usual hot dog into something more hearty and tasty for my husband and I.

Another thing I like to do if my eyes are bigger than my stomach and I heat up too much chili is make Cheese and Hormel Chili Dip. Which can also be great if you are going to a Halloween party this week and need to bring a dish to share. You can get the easy recipe here. Next time I suggest  dipping bell peppers in it.
What else do you like to put Hormel Chili on?
In the spirit of full-disclosure, I’ve partnered with Hormel Foods as part of the Hormel Foods Extended Family Blogger Program. Throughout the year I’ll be receiving product, coupons, giveaways and promotions. However, no payment was given or expected for posting about the program, and as always, all opinions given here are fully my own 

Monday, October 27, 2014

Easy Dinner Ideas- Fajitas into Tortilla Soup

I don't know about you but this is going to be a crazy week for me. I have 1 child having surgery, practices, Halloween activities, church responsibilities and other time consuming things going on.  I like to have a few go to recipes that I can go to when having a day (or in this case a week) that I need a quick dinner using ingredients on hand. Sometimes the hard balance with this is healthy dinner vs. quick dinners. Several days this week I am going to post some of the things I make for my family in a pinch and how I like to make them more mommy and daddy approved.
Since yesterday I had some time to cook and prep for the week I decided to make fajitas for dinner. Diced some yummy bell peppers that have been awesomely priced, added some chicken and made fajitas. Fajitas with a wheat tortilla and some non fat plain greek yogurt makes it  a win for me. Chicken, cheese and tortillas made it a win for my kids.

Then tonight we are using the leftovers to make a crockpot tortilla soup. I threw the leftover fajitas in the crock pot and added about a cup of chicken broth, black beans, kidney beans, corn, diced peppers and a can of enchilada sauce. My husband likes to eat his with tortilla chips, while my kids mix their soup with sour cream. Depending on the diced peppers and/or enchilada sauce it can come out a little spicy.  Another nice thing is sometimes if I have a ton left over I freeze the soup, then next time I'm in a pinch again all I need to do is reheat and serve.
This is one of my favorite use of leftovers into a different recipe. What's yours? I would love to know. Comment, tweet or facebook me yours. Maybe I'll share it with everyone :)

Tuesday, September 30, 2014

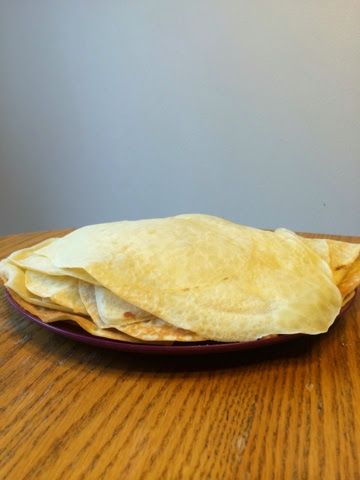
Chocolate Peanut Butter Banana Crepes


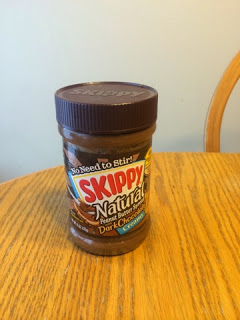
Crepes with Skippy Chocolate Peanut Butter and Bananas


1 cup all-purpose flour
2 eggs
1/2 cup milk
1/2 cup water
1/4 teaspoon salt
2 tablespoons butter, melted


In a large mixing bowl, whisk together the flour and the eggs. Gradually add in the milk and water, stirring to combine. Add the salt and butter; beat until smooth.


Heat a lightly oiled griddle or frying pan over medium high heat. Pour or scoop the batter onto the griddle, using approximately 1/4 cup for each crepe. Tilt the pan with a circular motion so that the batter coats the surface evenly.


Cook the crepe for about 2 minutes, until the bottom is light brown. Loosen with a spatula, turn and cook the other side. Serve hot.


One thing that helps if your crepes are getting too thick (especially if you don't want to buy one more thing to take up room in your kitchen that is made to cook 1 thing like a crepe pan) then buy a crepe spreader. You just spin this in the middle of the crepe and it spreads it even and it keeps the crepes in a nice circle. 


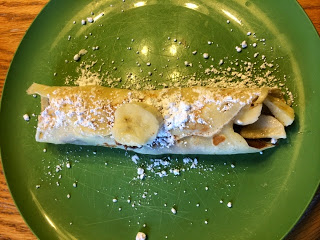
After the crepes are done than you add a generous amount of Skippy Chocolate Peanut Butter and  sliced bananas inside the crepe, and roll them up. This is actually one of my favorite kind of crepes. If there are extra crepes left over then sometimes when the kids aren't looking I can heat one up for myself and do this really quick. As a side note my son likes to make one with Skippy peanut butter, chocolate chips and powdered sugar.
In the spirit of full-disclosure, I’ve partnered with Hormel Foods as part of the Hormel Foods Extended Family Blogger Program. Throughout the year I’ll be receiving product, coupons, giveaways and promotions. However, no payment was given or expected for posting about the program, and as always, all opinions given here are fully my own    

Sunday, September 28, 2014

How to Make Taco Night That Much Better!


Taco night is one of our favorites. Since I'm Hispanic I grew up eating and learning to cook a lot of Hispanic dishes. When we first got married the only thing I really knew how to cook was Mexican food. Then when we went out to eat my husband would ask, "What are you craving?" I would innocently respond, "Umm, Mexican food?!" So here are a few tips that can help make your taco dinner a little yummier.

First off don't skimp on the taco seasoning! I don't buy taco seasoning packets; I buy my taco seasoning in bulk from Costco. This way I am not limited to the amount in a packet and can add plenty of seasoning. 

 Another little thing that can add some flavor is cilantro. I like to cut up cilantro with some green onions and mix them up. This adds a little freshness to your taco. Cilantro is kind of my food cowbell so to speak, EVERYTHING could use a little more cilantro.
 Next use corn tortillas. I never buy those hard shell, pre-made taco shells, that is nada bueno en mi casa ;) My roomate and I use to fry ours in oil when we made them. I did that until I started having kids, now it is faster and healthier just to heat them up on my griddle.
Don't forget yummy fresh produce! I have so many tomatoes from my garden I have been thinking of as many meals as possible to add tomato too. Then I suggest a good salsa. Store bought or from scratch I like chunky and flavorful salsa. I was nervous when Hormel sent me some salsa to review because I am kind of picky about my salsas, but we loved it! You can even see the onions and cilantro chunks in it. And no cilantro in your salsa and fresh on top is not too much cilantro!!! Next time you can't decide what salsa to try give Herdez Salsa Casera a try.
 Last but not least a good taco needs avocado or guacamole. Where I live avocados aren't always cheap. I prefer fresh avocados, but when they aren't a good price or ripe then try Wholly Guacamole. My blogging friend Utah Moms Life says one of her kids only eats his tacos with cheese and Wholly Guacamole. She taught me that you can freeze them. So last time they were on sale I bought several and froze them. It was a nice addition one time when I was low on groceries and literally only had tortillas, meat and cheese on hand. I was so grateful to have those in my freezer to make dinner  that much better. Now Wholly Guacamole has these mini 100 calorie cups you buy as well. They are great for on the go or when just needed to add a little to your meal and not wanting a whole lot. I put 2 in the freezer I will let you know how those hold up in the freezer in the future.

So next time you make tacos for dinner try one of this little tweaks to enhance your taco's flavor. Enjoy!


In the spirit of full-disclosure, I’ve partnered with Hormel Foods as part of the Hormel Foods Extended Family Blogger Program. Throughout the year I’ll be receiving product, coupons, giveaways and promotions. However, no payment was given or expected for posting about the program, and as always, all opinions given here are fully my own 

Friday, August 29, 2014

Make Your Own Bread Crumbs

Ever wonder what to do with the ends of the bread. Or have your kids left the bag wide open and the bread started getting hard? You should make your own bread crumbs with it. I love how expensive bread crumbs are. Really? It crumbs! From bread!
Its really pretty easy. I leave the bread out on a plate to dry out for a day or 2. Then I crunch it up to fit in my magic bullet and I pulse it. Then I add some Italian seasoning, shake it up and store it in a mason jar. Done, see not hard at all!

Next I need to make some of my own meatballs and freeze them. Tweet me your favorite meatball recipes.

Monday, August 25, 2014

Year of Firsts- Vaseline Head


I was having a rough "mom" day recently when I decided I needed a nap so I could wake up refreshed and a happier mommy. Although while I was resting this little girl decided she needed to bathe in the Vaseline. I mean the entire Costco size tub all over her! Her Legs were coated (and drawn on), her entire dress was coated as if made of Vaseline, her arms, neck, face and last but not least her entire head of hair. Now I have had kids get some Vaseline in their hair before but not like this. Not an entire mask of it. So I called my hair dresser mom friend, asked Facebook for advice and googled it. Here is what I found based on top ideas and suggestions.
 
This was OK, but not the best. Baby oil helped but wasn't thorough enough for my liking.


This (and Peanut Butter) is what I have used for gum in the hair issues. It also helped some, but wasn't a winner of all what I tried.


Corn starch was my #1 favorite. I went through a whole box. I sprinkled it throughout her hair let it soak some up then squeezed tons out. I did that 2-3 times. Then washed it with dish soap. Dish soap is meant to help cut and fight grease. I did that twice before washing it.
.
My hairstylist mom friend recommended a clarifying shampoo as well. This also helped out when I was washing in between all the different household products I found.
In the end I must have washed her hair a dozen times, because she laid there for almost an hour. Even then her hair was still pretty greasy over the next 2-3 days till after a few mores wear and washed it finally came clean.
Queen of Chaos Year of Firsts

Friday, August 22, 2014

Guest Blog Post on Some Fun Road Trips

I am in denial that summer is over. There is still some fun weekends and Labor day weekend to squeeze in some fun adventures. If you want to plan something fun for your family, then today's guest blog post is perfect. Whitney has some fun places to visit all within a 6 hour drive of Salt Lake City.
3 Fun Summer Road Trips You Most Likely Haven’t Enjoyed Yet
Author: Whitney Hollingshead
Utah is home to some pretty incredible natural and manmade attractions. If Utah is also home to your family, you don’t have to venture far to find adventure. This year, however, you may want to consider venturing out into some of the nearby states to explore some unchartered territory. Here are three great family friendly destinations that may be new to your family. All three locations are within a six hour car drive from Salt Lake City.

Destination: Bruneau Dunes State Park, Idaho
Hours from Salt Lake City: 5
What to Do:
Sandboard on the Dunes - bring along your snowsled or rent a sandboard from the visitor’s center at the park. You can also hike on and around the dunes and play in the sand. Keep in mind that the sand will most likely be hot on a hot summer day so plan accordingly. Everyone will be covered in sand afterward, so have a plan to deal with the sand.
Star Gaze at the Observatory - special events at the public observatory in the park offer some great star gazing opportunities. Check out the park events schedule and check the weather forecast.
Camp in the State Park - plan to stay the night and pitch your tent. Your family can enjoy fishing, swimming, hiking, and bird watching. Bring along some kites and make the most of the Idaho wind!
Road Trip Tip: The drive through northern Utah and southern Idaho has little to hold the attention of children. Pack some extra car games, activities, fun music, and even audio books to keep the whole family relaxed and entertained.

Destination: Glenwood Springs, Colorado
Hours from Salt Lake City: 6
What to Visit:
Glenwood Caverns Adventure Park - ride up the mountain on the gondola tram. Get your heart racing on one of the thrill rides like the Cliffhanger roller coaster. Take in a 4D movie experience with moving seats and challenge the family to a game of laser tag. You should also check out the cave tours included in some of the ticket packages.
Hanging Lake - take the short, steep, hike beginning in Glenwood Canyon. Hanging Lake was formed by glaciers suspended at the edge of the canyon. This lake boasts stunning waterfalls, a lake full of trout, and crystal clear water.
Glenwood Hot Springs Pool - visit the world’s largest hot springs pool. You can swim in the warm mineral water pool the length of a football field. The kids can enjoy the kiddie pool and two waterslides.
Road Trip Tip: Pack a separate bag to stay in the car at all times. Keep an extra simple change of clothes for each family member, wet wipes, hand sanitizer, sunscreen, and a first aid kit. This will help you be ready for the unexpected while you are out having fun. You should also consider stocking up on simple snacks to eat in the car. Doing so will save you time and money when you need to stop for gasoline.

Destination: Thermopolis, Wyoming
Hours from Salt Lake City: 6
What to Visit:
Wyoming Dinosaur Center - visit the dinosaur museum showcasing over 30 mounted dinosaurs, hundreds of displays and dioramas, and a modern preparation laboratory. You can also tour nearby dig sites and see actual excavation of real dinosaur bones from the ground. Special programs are also offered that allow you and your kids to participate in real fossil digs! These special programs do require signing up in advance.
Star Plunge Pool Complex - Thermopolis is home to the Hot Springs State Park. These hot springs are used to heat the local swimming pools. Take the plunge into one of the indoor or outdoor pools. Test out your tricks on the diving board or head down one of the three fast-paced water slides. The adults can relax in an adults-only sauna and there is also a separate kiddie pool.
Legend Rock Petroglyph Site - Hike to one of the most impressive petroglyph areas in the world. In order to visit the site, you must first obtain a key form the Thermopolis-Hot Springs Chamber of Commerce in Thermopolis.
Road Trip Tip: Make sure your car is in great condition for your trip. Take care of any needed tune ups or repairs. You may want to consider having your tires checked and rotated before you head out as well. If you have been planning to buy a new car for your family, buying one before your big trip might be the perfect time to make the purchase. Be sure to check out online specials from local dealers to see if you can find what you are looking for and stay on budget.
Summer is the perfect time for exploring. Plenty of time is still available to enjoy a short trip to one of these fun destinations. So clear your calendar, pack the car, and take your family on a summer trip they’ll remember forever.